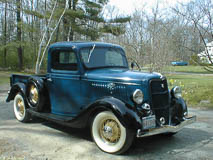
Fenton Headers and Dual Exhaust
I've got a '35 pickup with a bit of a mongrel engine and other set up. The block is a '37 block but is running '36 heads (with the water pumps on the heads) and special plates/motor mounts where later water pumps would go. I've
also had a '37 steering box put in. The brakes have been converted to hydraulic brakes, although that shouldn't affect how the headers fit (at least I don't think so).

Anyway, I ordered from Fenton Headers from Red's Headers a few weeks ago and was just able to squeeze the driver's side header into place although it was touching the steering box: when I had the new steering box installed I had my mechanic put some washers under the front motor mount to provide the clearance. You can see the fit in the picture above.


The other bit of preparation was moving the battery out from under the driver's seat rather than routing the exhaust under the running boards or something else. I ended up putting it on a battery tray in the engine compartment
on the passenger side, but would be interested in suggestions on other places to put it more out of the way. The tray is held in place with hardware store L-brackets with a fairly heavy piece of strapping bent as a triangle
bracing on one of the L-brackets. I put a late model Ford starter switch on the inner fender and ran a pair of wires over to the floor mounted starter switch.
Since everything seemed to fit, I sent the headers off to High Performance Coatings (no longer in business -- or at least not on the web -- but similar to Jet Hot Coatings) to
get a ceramic/aluminum coating and this Monday I was able to bring the truck to a custom exhaust place to get some stainless steel pipes and mufflers installed.


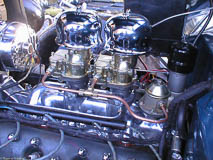
The good news is that everything fits and sounds good, and I'm ready to plan the next step of putting on a dual carb intake manifold. The bad news is that the guy installing the headers took a grinder to get a little more clearance.
It makes me really wish I'd done this before getting them coated, or that I'd been able to hang around the muffler shop and suggest they try shimming the motor a little higher instead. Right now things don't look too bad because
the cast iron is still bright from the grinding. The discoloring in the picture on the left looks a little worse than it does in real life at the moment, but is probably a harbinger of what it will look like soon. Sometime
when I have more energy (like sometime this winter when I won't be driving the truck anyway), I'll have to get that header out and get it recoated. The picture on the right shows the header on the passenger side.
Oh, and of course to keep things interesting, while the exhaust was being installed, the shift lever decided it would be a good time to jump out of the gates and keep the truck stuck in second gear. The muffler shop guys had to
push it around on to the lift, and despite having the right idea couldn't get the shifter back in correctly. The trick was after removing the shift lever (which is easy), making sure BOTH shifter gates were in the neutral position
before putting the lever back.
After getting the transmission back together, the 30 mile drive home was uneventful. The exhaust has a nice low rumble at idle, but makes itself heard if you want to when you get going. I was pleasantly surprised by a very mild
lope at idle, just enough to let you know it's a V8, even though I have a stock cam, as far as I know.
Here's a close-up of one of the Megg's megaphone exhaust tips.

The next task was installing dual carburetors after the truck was put away for the winter.